This is a new style of card that I have enjoyed making. It's called eclipse cards, presumably because you have to move the card slightly to see the dimension of the word. The raised word matches the pattern on the rest of the card. It looks more complicated than it actually is. The word can be cut out using either dies or an electronic cutting machine. I used my Cameo 3.
You could stamp/draw and colour a design if preferred but I used patterned paper cut slightly smaller than the base card. The paper is from the Docrafts Chronology Steampunk collection.
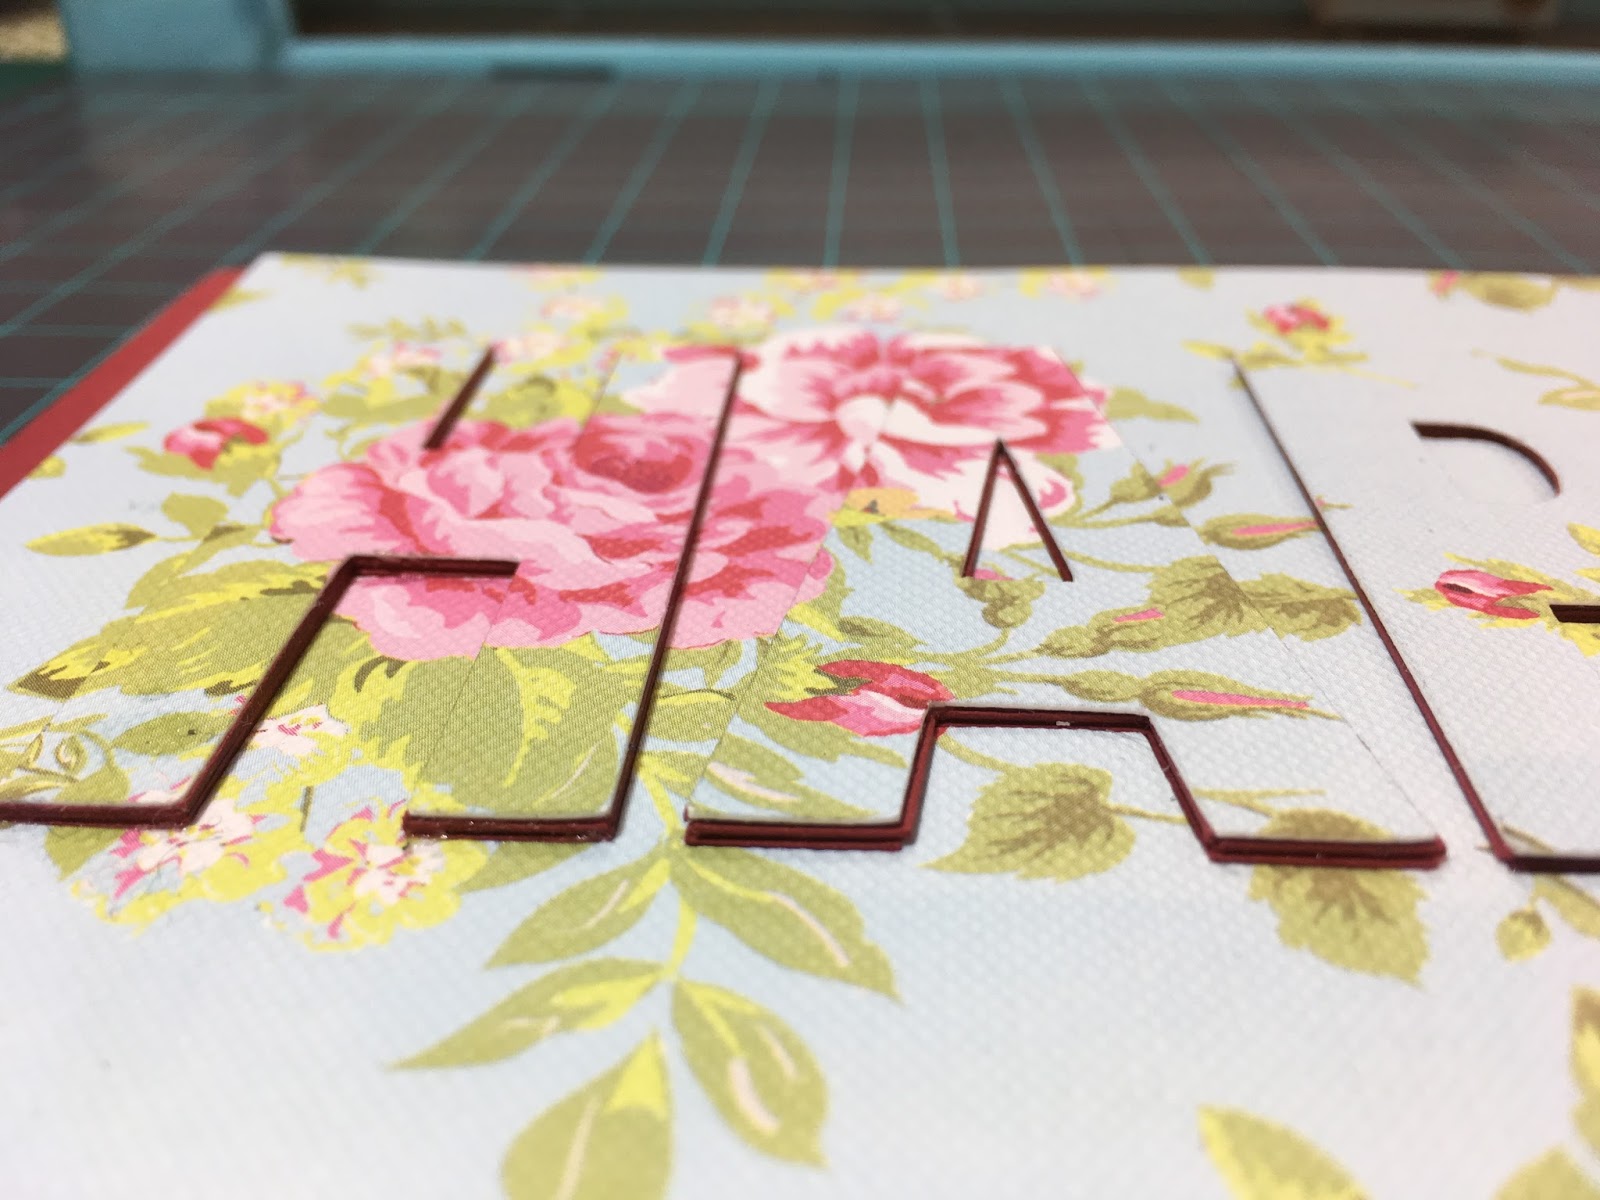
I placed the paper onto my cutting mat and created the name choosing "Rockwell extra bold" font sizing it to ensure it fitted the paper. If you don't have an electronic cutting machine simply line up your letter dies and secure with some masking tape so the letters don't move when feeding through your cutting machine. Keep all the letters they'll be needed later.
 Next I cut out 4 of each letter using the same card as the base and adhered the letters on top of each other to create thick letters. Alternately you could cut the letters again using funky foam and adhere the patterned letters to that to get dimension.
I then adhered the letters cut from the patterned paper on top of each coordinating letter.
 I matted the pattern paper, with the letters missing, onto the base card.
Next I adhered each letter back into the spaces left on the pattern paper making sure the letters matched the pattern. If you use a word than more than one of the same letter it is important to make sure that the letters go into the correct space so the pattern still matches the whole design.
Because the paper was quite dark and heavily patterned I edged the letters with black Wink of Stella glitter pen so they stood out a little more.

 This is another eclipse card I made for a female. Again I used my Cameo 3 to cut out the letters also the "Birthday" which left the base card showing underneath. The fonts used were Impact and Milkshake. Because there were 2 letter P's I had to make sure each one was placed in the correct space to match the pattern. The pattern paper was from my stash. If You would like the cutting file for the Happy Birthday card you can download it HERE. The zip file contains .studio, .svg and .pvgc formats.
I found these cards fun to make!
You could stamp/draw and colour a design if preferred but I used patterned paper cut slightly smaller than the base card. The paper is from the Docrafts Chronology Steampunk collection.
I placed the paper onto my cutting mat and created the name choosing "Rockwell extra bold" font sizing it to ensure it fitted the paper. If you don't have an electronic cutting machine simply line up your letter dies and secure with some masking tape so the letters don't move when feeding through your cutting machine. Keep all the letters they'll be needed later.
 Next I cut out 4 of each letter using the same card as the base and adhered the letters on top of each other to create thick letters. Alternately you could cut the letters again using funky foam and adhere the patterned letters to that to get dimension.
I then adhered the letters cut from the patterned paper on top of each coordinating letter.
 I matted the pattern paper, with the letters missing, onto the base card.
 Next I adhered each letter back into the spaces left on the pattern paper making sure the letters matched the pattern. If you use a word than more than one of the same letter it is important to make sure that the letters go into the correct space so the pattern still matches the whole design.
Because the paper was quite dark and heavily patterned I edged the letters with black Wink of Stella glitter pen so they stood out a little more.
 This is another eclipse card I made for a female. Again I used my Cameo 3 to cut out the letters also the "Birthday" which left the base card showing underneath. The fonts used were Impact and Milkshake. Because there were 2 letter P's I had to make sure each one was placed in the correct space to match the pattern. The pattern paper was from my stash. If You would like the cutting file for the Happy Birthday card you can download it HERE. The zip file contains .studio, .svg and .pvgc formats.
I found these cards fun to make!
I love the look of these cards. I can't wait to try it. Thanks for sharing your blog and the free files.
ReplyDelete